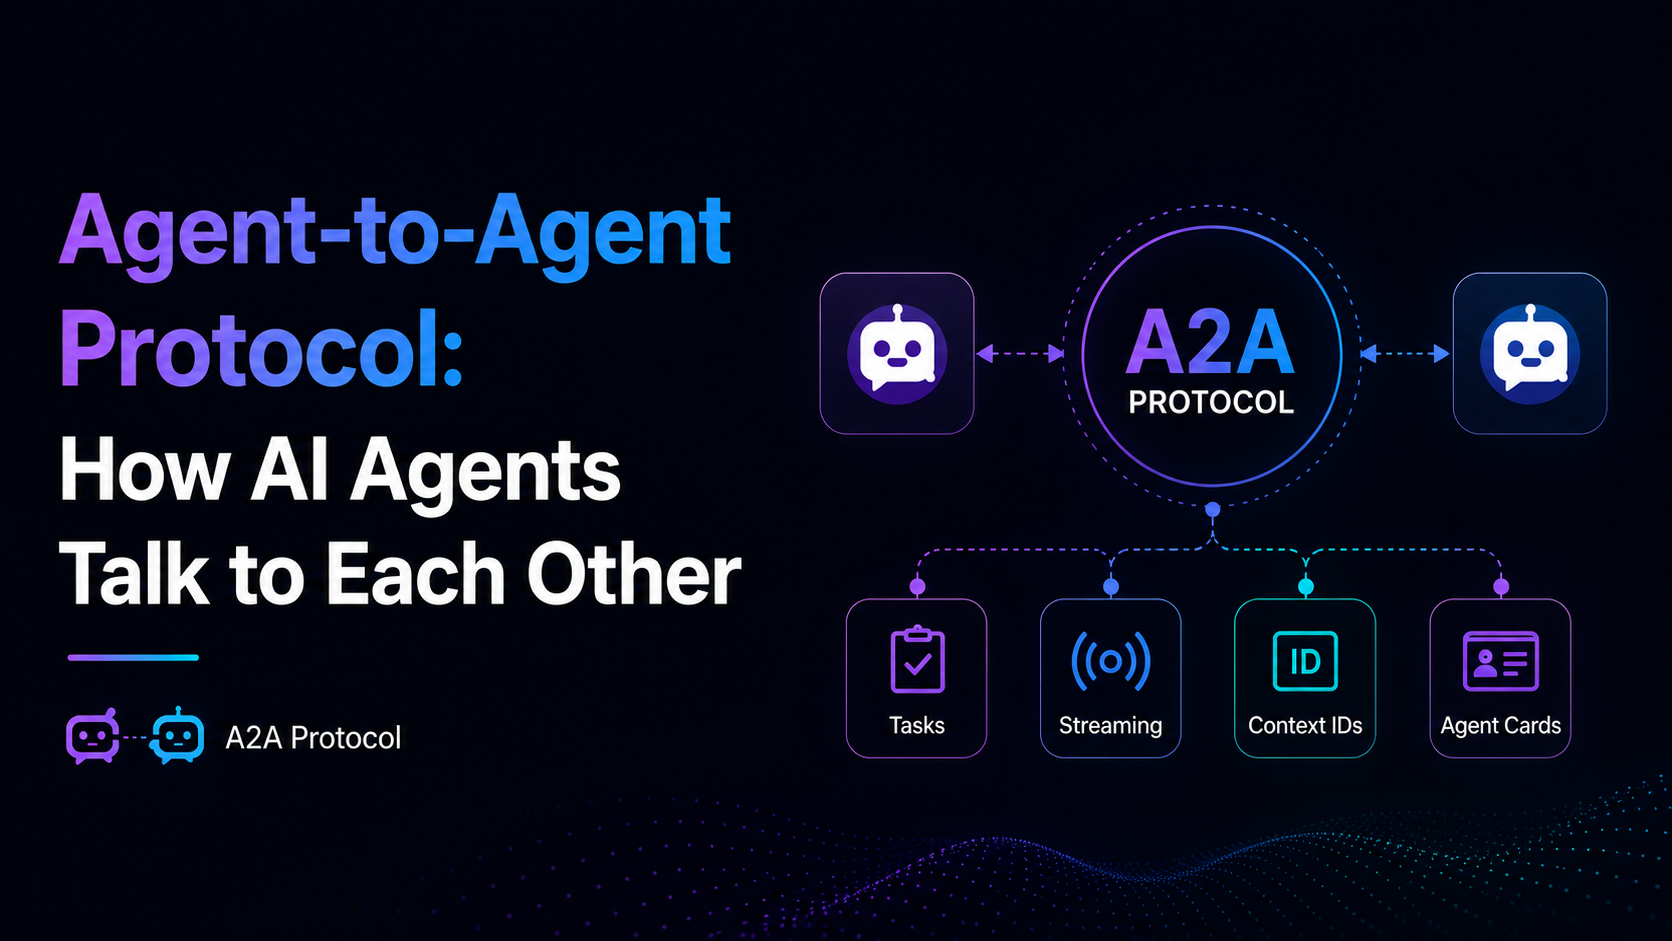
Agent-to-Agent Protocol
When we first started building AI features, most of them looked like a simple chat box. The user typed something, we sent it to an LLM (Large Language Model), and the model returned some text. That was already useful, but the moment you start building agents that actually do work, a chat box is no longer the whole story.
An agent might need to answer a customer, check an order status, verify a payment, create a return request, or ask a human for approval before continuing. In a real company, these capabilities rarely live inside one perfect agent. They are usually spread across multiple services, teams, tools, and vendors.
That brings us to a very practical question: how does one agent talk to another agent if both were built by different teams, in different frameworks, and deployed behind different APIs?
Without a standard protocol, every integration becomes custom glue code. One client knows how to call the order lookup agent, another client knows how to call the payment agent, and yet another one knows how to call the returns agent. Slowly, the system starts looking like this:
Product Support Agent -> custom HTTP API -> Order Lookup Agent
Product Support Agent -> custom SDK      -> Payment Agent
Product Support Agent -> custom queue    -> Returns Agent
This works for a while. However, as soon as you add more agents, the system becomes hard to discover, test, secure, and operate. Every new agent needs another custom integration, and every custom integration becomes one more thing you need to document and maintain. That is exactly the problem Agent-to-Agent, commonly called A2A, is trying to solve.
In this article, we are going to understand A2A from the ground up. We will use TypeScript for examples because it keeps the request and response shapes easy to read, and we will use a small Mastra agent as the actual brain behind the A2A endpoint.
We are not going to build a large production project here. Instead, we will focus on the pieces you need to understand first: who created A2A, how it compares with MCP, what an agent card looks like, why messages become tasks, how streaming and non-streaming calls behave, why taskId and contextId are different, how Mastra fits into the picture, and what changes when you run multiple A2A server replicas.
💡 The official A2A specification is available at a2a-protocol.org, and the JavaScript SDK lives in the
a2aproject/a2a-jsrepository. The examples here intentionally stay small so we can focus on the protocol instead of building a giant demo project.
What is A2A?
Before we move ahead, let’s understand what A2A actually means. A2A is an open protocol that lets AI agents discover and communicate with each other.
Think of it like HTTP, but at the agent level. HTTP does not care whether your server is written in Node.js, Go, Rust, Java, or Python. A browser sends a request, the server sends a response, and both sides understand the same rules.
A2A follows a similar idea. A client does not need to know whether the remote agent uses Mastra, LangGraph, CrewAI, Semantic Kernel, or a custom framework. It only needs to know a few things:
- where the agent is
- what it can do
- how to send it a message
- how to track the work
- how to receive the answer
At a high level, A2A gives us two things:
Discovery  -> "Who are you and what can you do?"
Execution  -> "Please do this task and send me the result."
Discovery happens through an agent card, while execution happens through messages, tasks, status updates, and final responses. Before we go into the card, let’s answer two common questions first: who created A2A, and how is it different from MCP?
Who created A2A?
A2A was introduced by Google in April 2025. Google announced it as an open protocol for agent interoperability, with support and contributions from more than 50 technology and services partners. The announcement mentioned companies such as Atlassian, Box, Cohere, Intuit, LangChain, MongoDB, PayPal, Salesforce, SAP, ServiceNow, UKG, Workday, Accenture, BCG, Capgemini, Cognizant, Deloitte, Infosys, KPMG, McKinsey, PwC, TCS, and Wipro.
Later, Google also announced that A2A was contributed to the Linux Foundation, which matters because protocols become more useful when they are not controlled by one vendor’s product roadmap.
💡 You can read Google’s original announcement in the Google Developers Blog and see the broader ecosystem on the A2A partners page.
The important point is this: A2A did not appear as a tiny convenience wrapper inside one SDK. It was designed as an interoperability protocol for systems where agents may come from different vendors, frameworks, and platforms.
A2A and MCP
A2A vs MCP
If you have followed agent tooling recently, you have probably heard about MCP as well. MCP stands for Model Context Protocol. It was introduced by Anthropic, and tools like Claude Code already support it for connecting an AI assistant to external tools and data sources.
This creates a natural question: does A2A replace MCP? No. A2A and MCP solve different problems, and in a real system you might use both.
MCP -> Agent talks to tools and data
A2A -> Agent talks to another agent
Let’s make this more concrete. If an agent needs to query an orders database, read a payment record, fetch a shipping update, or create a return request, MCP is a good fit because the tool has a clear input and output.
Agent -> MCP server -> orders database
Agent <- MCP server <- order status
But if an agent needs to delegate work to another autonomous agent, A2A is a better fit. The other side is not just a function call. It may have its own memory, tools, policies, workflows, and long-running task lifecycle.
Product Support Agent -> A2A -> Order Lookup Agent
Product Support Agent <- A2A <- task updates and final answer
I like to think of MCP as “give my agent hands” and A2A as “let my agent collaborate with another worker”. This means a real system can use both:
User
  |
  v
Product Support Agent
  |
  | A2A
  v
Order Lookup Agent
  |
  | MCP
  v
Orders database, payment system, shipping provider
In the example above, the product support agent uses A2A to talk to the order lookup agent, and the order lookup agent uses MCP internally to talk to the orders database, payment system, and shipping provider. These protocols are not fighting for the same seat. They sit at different layers.
Advantages and disadvantages
A2A has a few clear advantages. The first one is interoperability. The client does not need to know which framework the remote agent uses. It only needs the agent card and the protocol endpoint.
The second advantage is discovery. Instead of sending someone a README and saying, “Here is how you call our agent”, the agent publishes a card that describes what it can do.
The third advantage is long-running task support. Agent work is often not instant. A2A models the work as a task, so the client can receive progress updates, load task state later, or reconnect depending on the server implementation.
The fourth advantage is encapsulation. The remote agent does not need to expose its internal tools, prompts, memory, or database schema. It exposes capability, not implementation, which is exactly what we want when two teams do not own each other’s code.
However, A2A also has tradeoffs. Once tasks can outlive a single request, you need task storage. Once conversations span turns, you need memory storage. Once multiple pods are involved, both stores need to be shared. So yes, the protocol makes the agent boundary cleaner, but the backend still needs real engineering.
A2A is also newer than normal HTTP APIs and still evolving across SDK versions and transports, so you should expect some naming and implementation details to move over time. Debugging can also become more difficult because one agent may call another agent, which may call its own tools internally. When something goes wrong, the answer may be hiding across multiple logs, task states, model calls, and tool calls.
So if all you need is one assistant calling one database query, start with MCP or a normal tool call. If you need independent agents to discover each other, delegate work, and return task progress, A2A starts to make sense.
Now let’s start with discovery.
Protocol Basics
The agent card
Before one agent can talk to another agent, it needs to know what the other agent offers. In A2A, this information is published as an agent card.
An agent card is just a JSON document, but the role it plays is important. You can think of it like a small public profile for the agent. It does not show the agent’s private prompt, internal tools, database schema, or memory. It only tells the client what the agent can do and where to send a request.
A simple card can look like this:
{
  "name": "Order Lookup Agent",
  "description": "Answers customer order questions using order, payment, and shipping data.",
  "version": "1.0.0",
  "protocolVersion": "0.3.0",
  "url": "http://localhost:4000/a2a/jsonrpc",
  "capabilities": {
    "streaming": true
  },
  "defaultInputModes": ["text"],
  "defaultOutputModes": ["text"],
  "skills": [
    {
      "id": "lookup_order",
      "name": "Lookup Order",
      "description": "Answer questions about order status, payment status, and delivery updates.",
      "tags": ["orders", "support"]
    }
  ]
}
The above JSON looks simple, but it gives the client enough information to start. name and description tell the client what this agent is. url tells the client where to send requests. capabilities.streaming tells the client whether the agent can send progress updates while it works. skills describe what the agent can do.
Notice the boundary here. The card describes capability, not implementation, which is an important detail. A2A is designed for communication between agents, not for sharing the internal brain of an agent.
In many A2A servers, the public card is available at a well-known URL:
curl http://localhost:4000/.well-known/agent-card.jsonFor a custom route, you might expose it like this:
import express from "express";

const app = express();

const agentCard = {
  name: "Order Lookup Agent",
  description:
    "Answers customer order questions using order, payment, and shipping data.",
  version: "1.0.0",
  protocolVersion: "0.3.0",
  url: "http://localhost:4000/a2a/jsonrpc",
  capabilities: { streaming: true },
  defaultInputModes: ["text"],
  defaultOutputModes: ["text"],
  skills: [
    {
      id: "lookup_order",
      name: "Lookup Order",
      description:
        "Answer questions about order status, payment status, and delivery updates.",
      tags: ["orders", "support"],
    },
  ],
};

app.get("/.well-known/agent-card.json", (req, res) => {
  res.json(agentCard);
});
The card endpoint is usually public because discovery should happen before authentication. However, the execution endpoint should still be protected when the agent can access private data or perform real actions. In simple words, it is fine for people to know that the agent exists, but not everyone should be allowed to use it.
A2A endpoints
Now let’s pause for a moment and talk about HTTP endpoints, because this is one of those details that can feel confusing when you first look at A2A.
At minimum, an A2A server usually exposes two things:
GET  /.well-known/agent-card.json
POST /a2a/jsonrpc
The GET endpoint is for discovery. It returns the agent card, which tells the client what the agent is, what it can do, whether it supports streaming, and where the execution endpoint is.
The POST endpoint is for work. The client sends JSON-RPC requests to this endpoint. The actual operation is not decided by the URL. It is decided by the JSON-RPC method field inside the request body.
Before we go further, let’s quickly understand JSON-RPC as well.
JSON-RPC is a small request-response format where the client sends a method name and some parameters as JSON. It is not an agent-specific idea. It is a general way to say, “Please run this operation with these inputs.”
{
  "jsonrpc": "2.0",
  "id": 1,
  "method": "message/send",
  "params": {
    "message": {
      "kind": "message",
      "messageId": "msg-001",
      "role": "user",
      "parts": [{ "kind": "text", "text": "What can you do?" }]
    }
  }
}
In the example above, jsonrpc: "2.0" tells the server which JSON-RPC version we are using. id lets the client match the response with the request. method tells the server which operation to run, and params carries the actual A2A message.
This is useful because A2A has multiple operations. Instead of creating a different HTTP route for every operation, a JSON-RPC server can expose one endpoint and dispatch based on the method field.
POST /a2a/jsonrpc
  method: message/send

POST /a2a/jsonrpc
  method: message/stream

POST /a2a/jsonrpc
  method: tasks/get
So in the example above, the HTTP endpoint is still /a2a/jsonrpc, but the A2A operation is message/send. If we change the method to message/stream, the URL can stay the same, but the server responds with an SSE stream instead of one final JSON response.
POST /a2a/jsonrpc
  method: message/send    -> normal JSON response

POST /a2a/jsonrpc
  method: message/stream  -> text/event-stream response
This is the payload-level view of A2A. The HTTP request is the delivery truck. JSON-RPC is the shipping label that says which operation to run. The A2A message is the package inside the truck.
Depending on the A2A version and protocol binding, you may also see REST-style endpoints. The newer A2A specification describes a binding where operations can map to URLs like this:
POST   /message:send
POST   /message:stream
GET    /tasks/{id}
GET    /tasks
POST   /tasks/{id}:cancel
POST   /tasks/{id}:subscribe
POST   /tasks/{id}/pushNotificationConfigs
GET    /tasks/{id}/pushNotificationConfigs
DELETE /tasks/{id}/pushNotificationConfigs/{configId}
GET    /extendedAgentCard
So when you read A2A code, do not memorize one URL and assume that is the whole protocol. The idea is more important: the agent publishes a card, the card tells the client which interface to use, and the client sends messages or task requests using the binding supported by that server.
Other A2A transports
The latest A2A specification separates the protocol into layers. The core concepts are things like agent cards, messages, tasks, artifacts, and status updates. Then those concepts can be exposed through different protocol bindings.
The standard bindings currently described by the A2A spec are:
JSON-RPC       -> method names inside JSON-RPC requests
gRPC           -> RPC methods generated from protocol buffers
HTTP+JSON/REST -> normal-looking HTTP endpoints
There is also room for custom bindings, but a custom binding still needs to preserve the same A2A meaning. In simple words, a task should still behave like a task, a message should still behave like a message, and the same operation should not mean something different just because the transport changed.
For most beginner examples, JSON-RPC over HTTP is the easiest to inspect because you can test it with curl and read the JSON body directly. For service-to-service systems where teams already use protocol buffers and generated clients, gRPC can be a better fit. For teams that prefer normal resource-style APIs, the HTTP+JSON/REST binding may feel more familiar.
The useful thing is that A2A does not make the data model depend on one transport. A client and server can choose a binding that fits their environment, while still talking about the same agent concepts.
A2A endpoints vs MCP endpoints
This is also different from MCP.
With MCP’s Streamable HTTP transport, the server typically exposes one MCP endpoint, such as:
POST /mcp
GET  /mcp
The POST /mcp request sends JSON-RPC messages from the client to the MCP server. The optional GET /mcp request can open an SSE stream so the server can send messages back to the client.
That sounds similar to A2A because both can use HTTP, JSON-RPC, and SSE. However, the purpose is different.
In MCP, the endpoint represents a tool/context server. After connection setup, the client asks the MCP server what tools, resources, or prompts it exposes.
Claude Code -> POST /mcp -> tools/list
Claude Code <- /mcp      <- available tools
In A2A, the endpoint represents another agent. The client first discovers that agent through the agent card, then sends messages that can create tasks.
A2A client -> GET  /.well-known/agent-card.json
A2A client -> POST /a2a/jsonrpc -> message/send
A2A client <- task or final message
So the simple comparison is:
MCP endpoint -> expose tools and context to an agent
A2A endpoint -> expose an agent to another agent or client
This is why MCP feels closer to “function calling over a standard protocol”, while A2A feels closer to “delegating work to another agent”.
The message
After the client reads the agent card, it sends a message to the agent. A message represents one thing said by a user, client, or agent. For beginner examples, the most common message is a user message with text inside it.
Think of it like sending a message to a support teammate. The content is, “Where is order ORD-1024?” But the system also needs metadata around it: who sent it, which message this is, and what kind of content it contains.
{
  "message": {
    "kind": "message",
    "messageId": "msg-001",
    "role": "user",
    "parts": [
      {
        "kind": "text",
        "text": "Where is order ORD-1024?"
      }
    ]
  }
}
There are three fields worth understanding first. messageId identifies this message. role tells us who sent it. parts contains the actual content.
But why does A2A use parts instead of a simple text field? The reason is that agents do not always exchange plain text. A message can contain text, structured data, files, or other content types depending on what the agent supports. For our examples, we will stay with text because it keeps the protocol easy to see.
The task
Here is the most important idea in A2A: a message creates a task.
This may look unnecessary at first. After all, why not just send a request and get a response?
The reason is that agent work is not always instant. The agent might need to call tools, wait for another system, generate a file, ask for approval, or stream progress back to the client. So instead of treating the request as a simple function call, A2A models the work as a task.
A task is similar to a support ticket. When a customer asks, “Where is my order?”, the support team may need to check the order record, payment status, shipping provider, and return policy before answering. The ticket is created first. The answer may come later. In between, the ticket can move through states like “created”, “in progress”, and “resolved”. A2A uses the same idea for agent work.
{
  "kind": "task",
  "id": "task-123",
  "contextId": "ctx-456",
  "status": {
    "state": "working"
  }
}
In the example above, the task has an id, a contextId, and a status. The task id is the handle for this specific work item. The contextId tells us which conversation this task belongs to. The status tells us where the work currently stands.
The status.state usually moves through a lifecycle like this:
submitted -> working -> completed
                    \-> failed
                    \-> canceled
This lifecycle is useful because agent work is not always a simple request-response operation. A human-facing UI can show “working”, a backend client can poll for the task later, and a streaming client can display each status update as it arrives.
If you have ever worked with a job queue, this should feel familiar. The difference is that A2A standardizes how agent clients and agent servers talk about that work.
taskId vs contextId
taskId and contextId are easy to confuse because both are identifiers and both appear near the same request. The easiest way to understand them is to think about a real support conversation.
Imagine you open a support chat with an online store. The whole chat has one conversation ID. Inside that chat, you may ask three separate questions: “Where is my order?”, “Was my payment captured?”, and “Can I return it?” Each question may create a separate ticket for the support team.
That is almost exactly how contextId and taskId work.
taskId identifies one unit of work. Every time the client sends a new message, the A2A server creates a new task, and that task gets a new taskId.
Message 1 -> task-a
Message 2 -> task-b
Message 3 -> task-c
As you can see, every message creates a different task. The client normally does not choose this ID. The A2A server or SDK creates it when the request arrives, stores it in the task record, updates it as work continues, and keeps it until the task reaches a terminal state such as completed, failed, or canceled.
The taskId itself is only an identifier. The actual task record contains the useful information: current status, message history, artifacts, timestamps, and anything else the server stores for that task.
contextId identifies the conversation. If the same user keeps talking to the same agent, all those tasks can belong to the same context.
Conversation ctx-123
  Message 1 -> task-a
  Message 2 -> task-b
  Message 3 -> task-c
Unlike taskId, the contextId usually comes from the client side. The client creates it when a conversation starts, then reuses it for the next turns in the same conversation. If the client does not provide one, the SDK may create one automatically, but the idea stays the same: one context groups related tasks.
The contextId also does not contain the conversation by itself. It is just the label for the conversation. The actual conversation history lives somewhere else, such as an agent memory store.
This matters a lot when you connect A2A to an agent framework like Mastra. Mastra memory needs a thread ID, and A2A gives us contextId, so the clean mapping is to use the A2A contextId as the Mastra memory thread:
await agent.stream(userText, {
  memory: {
    thread: requestContext.contextId,
    resource: userId,
  },
});
In the example above, thread is the Mastra memory thread ID. We are giving it the same value as A2A’s contextId, so both systems agree on which conversation this turn belongs to. resource is the user, tenant, or account boundary, which keeps memory isolated between users.
So the lifecycle looks like this:
Conversation starts
  -> client creates contextId: ctx-123
  -> Mastra later uses ctx-123 as memory thread

First user message
  -> server creates taskId: task-a
  -> task-a runs inside context ctx-123
  -> Mastra loads/saves memory thread ctx-123

Second user message
  -> server creates taskId: task-b
  -> task-b runs inside the same context ctx-123
  -> Mastra loads/saves the same memory thread ctx-123
Remember we talked about the task lifecycle earlier. That is about protocol work tracking. Mastra memory is about conversation continuity. contextId is the glue between them because it lets A2A and Mastra point to the same conversation without mixing up task state and chat history.
Sending Messages
Sending a blocking message
First, let’s look at the simplest execution mode: a blocking send. The client sends a message, waits, and receives the result when the agent is done.
Client
  | message/send
  v
A2A server runs the agent
  | final response
  v
Client
For the TypeScript examples in this article, we will use @a2a-js/sdk, which is the official JavaScript SDK for A2A. This package gives us the client helpers, server request handler, Express adapter, and task-store interfaces we need for the examples.
npm install @a2a-js/sdkWith the A2A JavaScript SDK, a client can look like this:
import { ClientFactory } from "@a2a-js/sdk/client";
import { v4 as uuid } from "uuid";

const factory = new ClientFactory();
const client = await factory.createFromUrl("http://localhost:4000");

const response = await client.sendMessage({
  message: {
    kind: "message",
    messageId: uuid(),
    role: "user",
    parts: [{ kind: "text", text: "What can you do?" }],
  },
});

console.log(response);
In the example above, the SDK first discovers the agent card, then uses the endpoint declared by the card. Your code only sends a message and waits for the final response, which is nice when the work is small and fast.
You can test the same idea with curl if your server exposes JSON-RPC directly:
curl http://localhost:4000/a2a/jsonrpc \
  -H "Content-Type: application/json" \
  -d '{
    "jsonrpc": "2.0",
    "id": 1,
    "method": "message/send",
    "params": {
      "message": {
        "kind": "message",
        "messageId": "msg-001",
        "role": "user",
        "parts": [
          { "kind": "text", "text": "What can you do?" }
        ]
      }
    }
  }'
The server eventually returns one JSON-RPC response. The id matches the request, and the result contains the A2A message from the agent.
{
  "jsonrpc": "2.0",
  "id": 1,
  "result": {
    "kind": "message",
    "role": "agent",
    "parts": [
      {
        "kind": "text",
        "text": "I can answer questions about customer orders."
      }
    ]
  }
}
💡 A2A has evolved across versions and transports. Some examples use JSON-RPC method names like
message/send, while newer binding examples may show names such asSendMessage. When you build against an SDK, follow the method names supported by that SDK version.
However, blocking mode is not great when the agent does multiple steps. If the agent is checking the order, verifying payment, asking the shipping provider, and then preparing a customer-friendly answer, the user sees nothing until the end. That is where streaming helps.
Streaming with SSE
Streaming lets the agent send updates while it works. In A2A, streaming commonly uses Server-Sent Events, or SSE. SSE is an HTTP response that stays open, so the server can keep writing data: events into the response while the client reads them one by one.
Client
  | message/stream
  v
A2A server
  | task submitted
  | status working
  | status working
  | final message
  v
Client
A streamed response might look like this:
data: {"jsonrpc":"2.0","id":2,"result":{"kind":"task","id":"task-123","status":{"state":"submitted"}}}

data: {"jsonrpc":"2.0","id":2,"result":{"kind":"status-update","status":{"state":"working","message":{"parts":[{"kind":"text","text":"Checking order status..."}]}}}}

data: {"jsonrpc":"2.0","id":2,"result":{"kind":"status-update","status":{"state":"completed"}}}

data: {"jsonrpc":"2.0","id":2,"result":{"kind":"message","role":"agent","parts":[{"kind":"text","text":"Order ORD-1024 is out for delivery."}]}}
The important point is that streaming does not create many tasks. It is still one task, but the client gets to observe the task while it changes.
With the SDK, streaming usually feels like reading from an async iterator:
for await (const event of client.sendMessageStream({
  message: {
    kind: "message",
    messageId: uuid(),
    role: "user",
    parts: [{ kind: "text", text: "Where is order ORD-1024?" }],
  },
})) {
  console.log(event);
}
This is the mode you want for interactive products. If an agent is checking order status, validating payment, calling a shipping API, or creating a return request, the UI can show progress instead of waiting silently and making the user wonder whether anything is happening.
Building an A2A Server with Mastra
Where Mastra fits
A2A is the protocol, while Mastra is the agent framework we will use for the implementation. Mastra is an open-source TypeScript framework for building AI agents and AI-powered applications. It gives us primitives such as agents, tools, memory, workflows, model routing, and observability, so we do not have to write the entire agent loop by hand.
This distinction is important because A2A should not contain your agent’s reasoning logic. It should expose the agent through a standard interface, while Mastra gives us the actual agent that can think, call tools, and use memory.
💡 If you want to go deeper into Mastra itself, start with the Mastra docs and the agents overview. I have also written a separate introduction to Mastra on this blog.
import { Agent } from "@mastra/core/agent";

export const orderLookupAgent = new Agent({
  id: "order-lookup-agent",
  name: "Order Lookup Agent",
  instructions: `
You answer customer questions about orders.
If you need current order information, use your tools before answering.
Keep answers short, clear, and customer-friendly.
  `,
  model: "openai/gpt-5.5",
});
In the example above, instructions is the agent’s job description. The model field uses Mastra’s provider/model format. For OpenAI models, Mastra reads OPENAI_API_KEY from the environment.
To run it directly:
import { mastra } from "./src/mastra/index.ts";

const agent = mastra.getAgentById("order-lookup-agent");
const response = await agent.generate("Can you help me check an order?");

console.log(response.text);
This is a normal Mastra call. No A2A yet. Before exposing the agent through A2A, let’s add one tool so the agent can do something concrete.
Giving the Mastra agent a tool
Tools are how an agent reaches outside the model. A tool has a name, a description, an input schema, and an execute function. The model sees the description and decides when to call it, while your code receives validated input.
import { createTool } from "@mastra/core/tools";
import { z } from "zod";

export const lookupOrderTool = createTool({
  id: "lookup-order",
  description: "Look up order, payment, and shipping status for an order ID.",
  inputSchema: z.object({
    orderId: z.string().describe("The order ID to look up"),
  }),
  outputSchema: z.object({
    status: z.string(),
    payment: z.string(),
    delivery: z.string(),
  }),
  execute: async ({ context }) => {
    return {
      status: "shipped",
      payment: "paid",
      delivery: `Order ${context.orderId} is out for delivery today.`,
    };
  },
});
Then attach it to the agent:
import { Agent } from "@mastra/core/agent";
import { lookupOrderTool } from "../tools/lookup-order-tool.ts";

export const orderLookupAgent = new Agent({
  id: "order-lookup-agent",
  name: "Order Lookup Agent",
  instructions: `
You answer customer questions about orders.
Use lookupOrderTool before answering questions about order status, payment, or delivery.
  `,
  model: "openai/gpt-5.5",
  tools: { lookupOrderTool },
});
The source is pretty straightforward. The agent does not know how to check an order by itself. It only knows that a tool exists. When the customer asks about an order, the model can call lookupOrderTool, inspect the result, and then answer in a customer-friendly way.
Now we have a small but real agent. The next step is to expose it over A2A.
The A2A executor
The executor is the bridge between the A2A protocol and your actual agent code.
This is easier to understand with a real-life example. Imagine a hotel reception desk. A guest does not walk into the kitchen, housekeeping room, billing office, and manager’s cabin directly. The guest talks to reception. Reception understands the request, sends it to the right team, tracks the progress, and gives the answer back to the guest.
In our A2A server, the executor plays a similar role. The A2A request handler understands the protocol. Mastra understands how to run the agent. The executor sits between them and translates one side into the other.
A2A client
  | message/send or message/stream
  v
A2A request handler
  | creates taskId and requestContext
  v
Executor
  | calls Mastra agent
  v
Mastra agent
  | returns text/tool results
  v
Executor
  | publishes task updates and final message
  v
A2A request handler
  | JSON response or SSE events
  v
A2A client
This separation is useful because the client should not need to know anything about Mastra. It only speaks A2A. At the same time, the Mastra agent should not need to know how SSE events, task updates, JSON-RPC responses, or A2A task stores work. The executor owns that translation.
In the A2A JavaScript SDK, an executor receives two important objects:
async execute(requestContext, eventBus) {
  // requestContext tells us what the user asked.
  // eventBus is how we publish task updates and messages.
}
requestContext contains the incoming message, the generated task ID, and the context ID. eventBus is how the executor sends protocol events back to the client and task store. Here is the shape of a Mastra-backed executor:
import type {
  AgentExecutor,
  ExecutionEventBus,
  RequestContext,
} from "@a2a-js/sdk/server";
import { v4 as uuid } from "uuid";
import { mastra } from "./mastra/index.ts";

export class OrderLookupExecutor implements AgentExecutor {
  async execute(
    requestContext: RequestContext,
    eventBus: ExecutionEventBus,
  ): Promise<void> {
    const userText = requestContext.userMessage.parts[0].text;
    const agent = mastra.getAgentById("order-lookup-agent");

    eventBus.publish({
      kind: "status-update",
      taskId: requestContext.taskId,
      contextId: requestContext.contextId,
      status: {
        state: "working",
        timestamp: new Date().toISOString(),
      },
      final: false,
    });

    const stream = await agent.stream(userText, {
      memory: {
        thread: requestContext.contextId,
        resource: "local-user",
      },
    });

    let text = "";

    for await (const chunk of stream.textStream) {
      text += chunk;
    }

    eventBus.publish({
      kind: "message",
      messageId: uuid(),
      role: "agent",
      contextId: requestContext.contextId,
      taskId: requestContext.taskId,
      parts: [{ kind: "text", text }],
    });

    eventBus.finished();
  }

  cancelTask = async (): Promise<void> => {};
}
Let’s walk through this slowly. First, we extract the user’s text from the A2A message and get the Mastra agent. At this point, the A2A side has already given us requestContext.taskId and requestContext.contextId, so we do not create those manually inside the executor.
Then we publish a working status so streaming clients immediately know the agent has started. This is the executor telling the A2A world, “I accepted the task and I am working on it.”
After that, we call agent.stream(). We pass requestContext.contextId as the Mastra memory thread, which is the important glue here. A2A owns the conversation identifier, and Mastra uses it to load the right conversation history.
Finally, we collect the streamed text and publish one final A2A message. This is the executor translating Mastra’s answer back into the A2A response format. This example keeps the final response as text, but in a real system you can also publish artifacts, structured data, or richer task updates.
Mounting the A2A server
The executor is only the business logic. We still need an HTTP server so an A2A client can actually call it. The A2A SDK gives us a DefaultRequestHandler, which connects the agent card, task store, and executor.
import express from "express";
import { DefaultRequestHandler, InMemoryTaskStore } from "@a2a-js/sdk/server";
import {
  agentCardHandler,
  jsonRpcHandler,
  UserBuilder,
} from "@a2a-js/sdk/server/express";
import { AGENT_CARD_PATH } from "@a2a-js/sdk";
import { OrderLookupExecutor } from "./order-lookup-executor.ts";

const requestHandler = new DefaultRequestHandler(
  agentCard,
  new InMemoryTaskStore(),
  new OrderLookupExecutor(),
);

const app = express();

app.use(
  `/${AGENT_CARD_PATH}`,
  agentCardHandler({ agentCardProvider: requestHandler }),
);

app.use(
  "/a2a/jsonrpc",
  jsonRpcHandler({
    requestHandler,
    userBuilder: UserBuilder.noAuthentication,
  }),
);

app.listen(4000, () => {
  console.log("A2A server running on http://localhost:4000");
});
In the example above, DefaultRequestHandler receives three things: the agent card, a task store, and our executor. The Express adapter then exposes the agent card endpoint and the JSON-RPC endpoint.
InMemoryTaskStore is enough for local testing because it keeps task state in memory while the process is running. However, this approach has an obvious limitation. If the process restarts, tasks are gone. If you run multiple server replicas, one replica cannot load tasks created by another replica. We will come back to this problem later when we talk about multi-pod deployment.
Demo
Testing locally
First of all, install the basic packages:
npm install @a2a-js/sdk @mastra/core @mastra/memory @mastra/libsql zod uuid express typescript @types/nodeThen set your model key:
export OPENAI_API_KEY="sk-..."Start your server:
npx tsx src/server.tsCheck the agent card:
curl http://localhost:4000/.well-known/agent-card.jsonYou should see the agent’s name, skills, endpoint URL, and capabilities. If this works, discovery is working and the client knows where the agent lives.
Now send a message:
curl http://localhost:4000/a2a/jsonrpc \
  -H "Content-Type: application/json" \
  -d '{
    "jsonrpc": "2.0",
    "id": 1,
    "method": "message/send",
    "params": {
      "message": {
        "kind": "message",
        "messageId": "msg-001",
        "role": "user",
        "parts": [
          { "kind": "text", "text": "Where is order ORD-1024?" }
        ]
      }
    }
  }'
A simple response might look like this:
{
  "jsonrpc": "2.0",
  "id": 1,
  "result": {
    "kind": "message",
    "role": "agent",
    "parts": [
      {
        "kind": "text",
        "text": "Order ORD-1024 is out for delivery today and the payment is marked as paid."
      }
    ]
  }
}
The exact text will vary because the model generates it, so do not worry if your answer is not word-for-word the same. The shape of the response is the important part. As long as you receive a message result, the blocking request worked.
Now let’s test streaming. Call the streaming method supported by your SDK version and inspect the SSE output:
curl -N http://localhost:4000/a2a/jsonrpc \
  -H "Content-Type: application/json" \
  -d '{
    "jsonrpc": "2.0",
    "id": 2,
    "method": "message/stream",
    "params": {
      "message": {
        "kind": "message",
        "messageId": "msg-002",
        "role": "user",
        "parts": [
          { "kind": "text", "text": "Can you check whether order ORD-1024 can be returned?" }
        ]
      }
    }
  }'
The -N flag tells curl not to buffer the response. Without it, you may not see events immediately. If streaming is working, you should see multiple data: events instead of one final JSON response.
Using A2A from Claude Code or another coding agent
Now let’s talk about a practical developer workflow, because this is where these protocols become more useful than just diagrams.
Claude Code already has strong support for MCP and skills. The official Claude Code docs explain how MCP connects Claude Code to tools and data sources, and how skills let you package repeatable instructions or scripts behind commands.
As of the official docs I checked while writing this article, Claude Code documents MCP support directly, but it does not expose A2A as a built-in connector in the same way. That does not block us. It just means we use normal client code and let Claude Code run it for us.
The simplest setup looks like this:
Claude Code
  |
  | runs local script
  v
Local A2A client
  |
  | HTTP / JSON-RPC / SSE
  v
Remote A2A agent
First, write a tiny A2A client script on your machine:
// file: scripts/a2a-send.ts
import { ClientFactory } from "@a2a-js/sdk/client";
import { v4 as uuid } from "uuid";

const message = process.argv.slice(2).join(" ");

const factory = new ClientFactory();
const client = await factory.createFromUrl("http://localhost:4000");

const response = await client.sendMessage({
  message: {
    kind: "message",
    messageId: uuid(),
    role: "user",
    parts: [{ kind: "text", text: message }],
  },
});

console.log(JSON.stringify(response, null, 2));
Now you can test it directly:
npx tsx scripts/a2a-send.ts "Where is order ORD-1024?"Once this works, any coding agent that can run terminal commands can use this A2A agent. The coding agent does not need native A2A support. It only needs permission to run your local script, which is often enough for local development.
For Claude Code, you can wrap this in a skill:
---
name: ask-a2a-agent
description: Ask the local A2A research agent a question.
disable-model-invocation: true
allowed-tools: Bash(npx tsx scripts/a2a-send.ts *)
---

Run this command with the user's question:

```sh
npx tsx scripts/a2a-send.ts "$ARGUMENTS"
```

Summarize the returned A2A message for the user.
Then invoke it like this inside Claude Code:
/ask-a2a-agent "Can you check order ORD-1024?"As we can see, the skill is not the A2A client. The skill is just a convenient wrapper. The actual A2A client is normal TypeScript code running on your machine.
You can use the same pattern with other coding agents as well. If the coding agent can run a shell command, it can call your local A2A client. If the coding agent supports custom tools, you can expose the same script as a tool. If it supports MCP but not A2A, you can even build an MCP server that calls A2A behind the scenes.
That last approach looks like this:
Claude Code -> MCP server -> A2A client -> A2A agentThis may look like extra plumbing, and to be honest, it is. But it is useful when your coding agent already has a good MCP integration and you want to reuse it while still talking to A2A-compatible agents.
Memory and Task Storage
Adding memory
So far, each message can run as its own task. That is fine for one-off questions, but conversations usually need continuity.
For example:
User: Where is order ORD-1024?
Agent: It is out for delivery today.
User: Can it still be returned?
The second message only makes sense if the agent remembers the first message. This is where contextId becomes useful, because the client can send multiple messages with the same contextId:
{
  "message": {
    "kind": "message",
    "messageId": "msg-002",
    "contextId": "order-support-chat",
    "role": "user",
    "parts": [{ "kind": "text", "text": "Can it still be returned?" }]
  }
}
Then the executor passes that value into Mastra memory:
const stream = await agent.stream(userText, {
  memory: {
    thread: requestContext.contextId,
    resource: "local-user",
  },
});
Mastra memory can store message history across turns. For local development, the Mastra docs commonly use @mastra/libsql with an in-memory database:
import { Mastra } from "@mastra/core";
import { LibSQLStore } from "@mastra/libsql";
import { orderLookupAgent } from "./agents/order-lookup-agent.ts";

export const mastra = new Mastra({
  agents: { orderLookupAgent },
  storage: new LibSQLStore({
    id: "mastra-storage",
    url: ":memory:",
  }),
});
For production, you would use durable storage. The idea stays the same: A2A provides the conversation ID, and Mastra uses it to find the right memory thread.
Why memory and task storage are separate
At this point, it is tempting to say, “Great, we have memory, so we are done.” However, agent memory and A2A task storage solve different problems, and mixing them up leads to confusing production bugs.
Agent memory answers this question:
What did this user and this agent talk about earlier?Task storage answers this question:
What happened to this specific A2A request?These are not the same thing. Imagine this conversation:
User: Where is order ORD-1024?
Agent: It is out for delivery today.
User: Can it still be returned?
Mastra memory helps the agent understand what “it” refers to in the second question. That is conversation history.
Now imagine the first request took 30 seconds and the browser refreshed after 10 seconds. The client may want to reconnect and ask, “What happened to task task-123?” That is not conversation memory. That is A2A task state.
A simple task store interface usually looks like this:
type TaskStore = {
  save(task: Task): Promise<void>;
  load(taskId: string): Promise<Task | undefined>;
};
The A2A request handler saves the task when it is submitted, updates it when the agent starts working, and saves the terminal state when the agent completes or fails.
submitted -> save(task)
working   -> save(task)
completed -> save(task)
This is what enables features like tasks/get or resubscribing to a running task, depending on what your SDK and transport support. So the short version is: memory helps the agent remember the conversation, while the task store helps the A2A server remember the work.
Production
What changes in a multi-pod setup
Local examples usually run one Node.js process. Production systems usually do not. In Kubernetes, Cloud Run, ECS, or any horizontally scaled environment, you may have multiple A2A server replicas behind a load balancer.
              -> A2A pod 1
Client -> LB  -> A2A pod 2
              -> A2A pod 3
This creates a few practical problems. Let’s look at them one by one.
First, in-memory task storage breaks. If pod 1 created task-123, but the next tasks/get request reaches pod 2, pod 2 will not know about that task.
message/send -> pod 1 -> task stored in pod 1 memory
tasks/get    -> pod 2 -> task not found
Second, in-memory agent memory breaks. If the first chat turn lands on pod 1 and the second chat turn lands on pod 3, the Mastra agent on pod 3 will not have the previous messages.
turn 1 -> pod 1 -> memory stored in pod 1 memory
turn 2 -> pod 3 -> no previous context
Third, SSE streams are connection-local. A streaming HTTP connection is attached to the pod that accepted it, which is fine while the connection stays open. But if the connection drops and the client reconnects to another pod, the new pod needs shared task state to know what happened.
To avoid this, both stores need to move outside the A2A server process.
              -> A2A pod 1 \
Client -> LB  -> A2A pod 2  -> shared task store
              -> A2A pod 3 /

              -> A2A pod 1 \
Client -> LB  -> A2A pod 2  -> shared Mastra memory
              -> A2A pod 3 /
All pods should use the same centralized task store and the same centralized agent memory store. For Mastra, that means using a shared storage backend instead of :memory::
import { Mastra } from "@mastra/core";
import { LibSQLStore } from "@mastra/libsql";
import { orderLookupAgent } from "./agents/order-lookup-agent.ts";

export const mastra = new Mastra({
  agents: { orderLookupAgent },
  storage: new LibSQLStore({
    id: "mastra-storage",
    url: process.env.MASTRA_STORAGE_URL,
    authToken: process.env.MASTRA_STORAGE_AUTH_TOKEN,
  }),
});
For A2A task storage, use the same idea. Replace InMemoryTaskStore with a database-backed implementation.
class DatabaseTaskStore {
  constructor(private db: Database) {}

  async save(task: Task): Promise<void> {
    await this.db.tasks.upsert({
      id: task.id,
      value: JSON.stringify(task),
      updatedAt: new Date(),
    });
  }

  async load(taskId: string): Promise<Task | undefined> {
    const row = await this.db.tasks.findById(taskId);
    return row ? JSON.parse(row.value) : undefined;
  }
}
The exact database does not matter as much as the property it gives you: every replica must see the same task state. Now the earlier failure case works correctly:
message/send -> pod 1 -> save task in shared DB
tasks/get    -> pod 2 -> load task from shared DB
And the conversation case also works:
turn 1 -> pod 1 -> save memory in shared Mastra store
turn 2 -> pod 3 -> load memory from shared Mastra store
If you want one simple production rule, start with this:
Keep A2A servers stateless. Put task state and conversation memory in shared storage.
You may still use sticky sessions for streaming connections if your infrastructure supports them, but sticky sessions should be an optimization, not the thing that makes correctness work.
Security basics
The agent card can be public, but the execution endpoint usually should not be public. If an agent can read customer data, check payment status, create return requests, or call internal order APIs, the A2A endpoint must authenticate the caller.
In an Express server, that usually means middleware before the JSON-RPC handler:
app.use("/a2a/jsonrpc", authenticateJwt);

app.use(
  "/a2a/jsonrpc",
  jsonRpcHandler({
    requestHandler,
    userBuilder: buildUserFromRequest,
  }),
);
The authenticated user or tenant should then flow into the executor:
const stream = await agent.stream(userText, {
  memory: {
    thread: requestContext.contextId,
    resource: requestContext.user.id,
  },
});
This gives you two boundaries. The HTTP layer decides who can call the agent, while the memory and tools layer decides what data that caller can access.
Do not rely on random task IDs as your only security boundary. Task IDs should be hard to guess, but authorization should still check whether the caller is allowed to see or modify that task.
Wrap-up
A simple way to think about A2A
When you remove all the implementation details, A2A is not that mysterious.
The agent card is discovery. The message is input. The task is work tracking. The status update is progress. The artifact is generated output. The final message is the answer. The context ID is conversation continuity. The executor is your bridge from the protocol to your actual agent code.
Once these concepts click, the rest becomes normal backend engineering. You choose a framework like Mastra for the agent runtime, expose it through A2A, persist task and memory state when needed, and protect the execution endpoint like any other API that can touch real systems.
That is the real value of A2A. It gives agents a shared language without forcing every team to use the same framework, model, memory store, or deployment architecture.